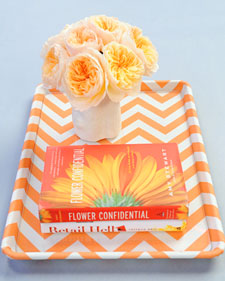
Decorative Tray
Tools and Materials- 1 yard decorative fabric
- Aluminum rimmed baking sheet
- Spray adhesive
- Scissors
- Fabric glue
- Synthetic felt
- 1/4-inch-thick acrylic sheet cut to fit inside of tray, with corners rounded
2. Place fabric on tray so pattern is aligned, leaving enough room to wrap fabric around all sides to the back. Smooth fabric onto tray, pressing out any bubbles.
3. Pull any extra material into corner and push around the edge. Turn tray over. Cover the back of the tray with spray adhesive.
4. Press the fabric over two edges of the tray first, then fold in on each remaining side, as if wrapping a gift. Trim any excess fabric with scissors. Use fabric glue to secure, if needed.
5. Cut a piece of felt to fit the back of the tray and conceal fabric edges. Smooth felt on the back the tray.
6. Place acrylic sheet in center of tray.

ResourcesBaking sheets available from Bowery Kitchen. 3M Super 77 spray adhesive available from The Home Depot. Custom-designed fabric available from Spoonflower. Beacon Fabri-Tac permanent adhesive available from Amazon. Synthetic felt available from Aetna Felt. Custom-cut acrylic sheets available at local hardware and glass/framing stores.
No comments:
Post a Comment